Angular From Scratch Tutorial – Index
PREVIUS: STEP ONE
NEXT: Angular From Scratch Tutorial – Step 3: Binding
Table of Contents
Note
The purpose of this page in this tutorial series is to provide a very fast approach that is useful for revisions when you have already dealt with Angular, but after an absense of using it, it turns necessary to do a “disk swap” bringing from “disk” to your “memory” again. 🙂
If it is your first Angular approach, or you are a newbie, it is recommended to go first to the Angular’s documentation. After, this page will serve you as a summary for fast referencing and revision.
Target
Creating a new component, to where the current initial page content will be moved to.
Providing routing to the moved content creating a link to it.
Source Code/Download
For more details, the source code may be found on GitHub, “step3” tag (includes step1 up to step3).
What is a Compoment
Using a simple way of defining things, we may see a component as a chunk of script belonging to its respective HTML.
I like to think about Angular as a segmented tool to bind HTML (the template) and its scripting code (the component) putting them together under the same folder, instead of having everything together and a huge code to dig in, up and down.
Each part takes care of a specific feature, split into HTML and its script code, making things easier.
The HTML code is called “template”.
The script part is the “component”.
Between, there is the interaction provided by “bindings”.

Excellent more detailed information at Angular’s documentation.
Commands to create component
ng generate component new-cmp
or
ng g component new-cmp
or ng g c new-cmd
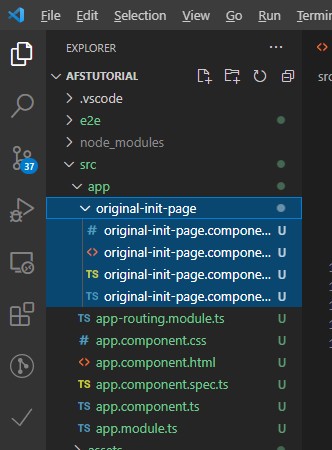
original-init-page”
The purpose of a component is perfect to our purposes of moving the content of the initial page to another place to be referenced by a specific URL.
Do:
ng g c original-init-page


Routing – URL setup
Target: we desire to access the content of the component.
Solution: we need to provide routing.
Change the app.app-routing.module.ts file to be like this:
import { NgModule } from '@angular/core';
import { Routes, RouterModule } from '@angular/router';

import { OriginalInitPageComponent } from './original-init-page/original-init-page.component';

const routes: Routes = [
  {path: '',   redirectTo: 'index',  pathMatch: 'full'},
  {path: 'ori-init-page', component: OriginalInitPageComponent }
];

@NgModule({
  imports: [RouterModule.forRoot(routes)],
  exports: [RouterModule]
})
export class AppRoutingModule { }
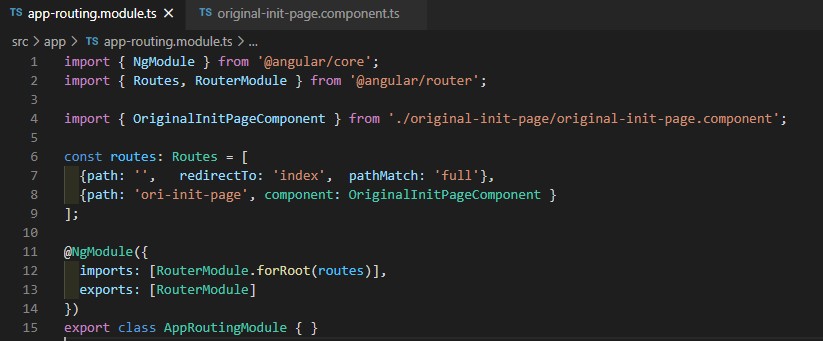
First you import the new component:
Testing
Pointing to:
http://localhost:4200/
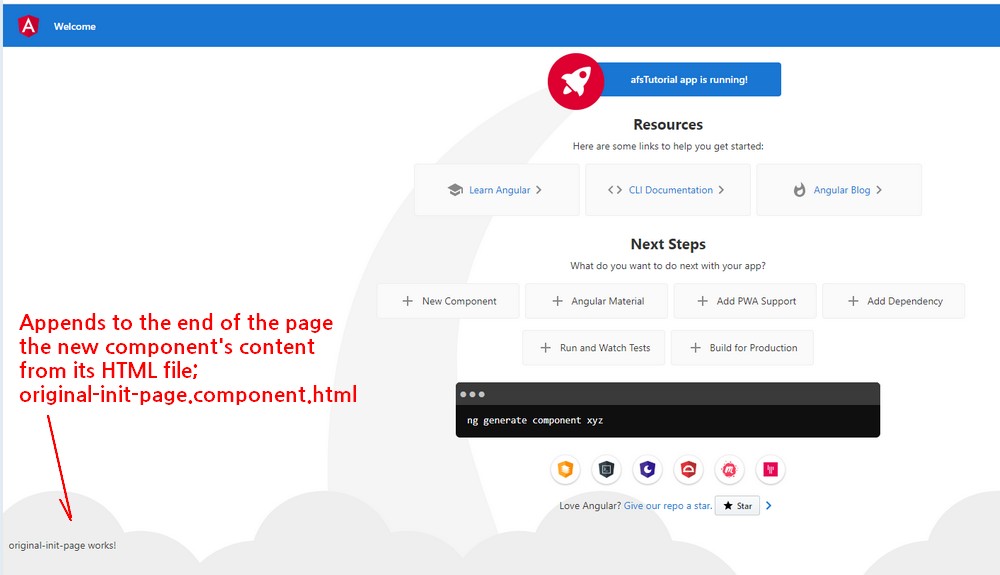
shall return the same thing, but pointing to:
http://localhost:4200/ori-init-page
returns the new component’s template content, appending to the button of the initial’s page content:
Moving the content from the index.html page to the new component
Go to the app.component.html and cut all the content except this last line:

containing just:
This markup is a placeholder that marks where the router will render its output filtered by the Routes that were configured above.
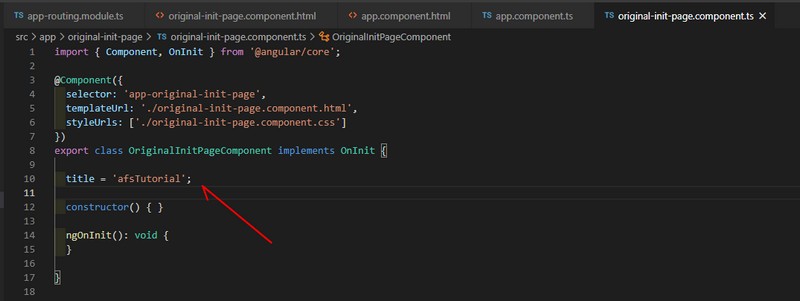
Check the images below:
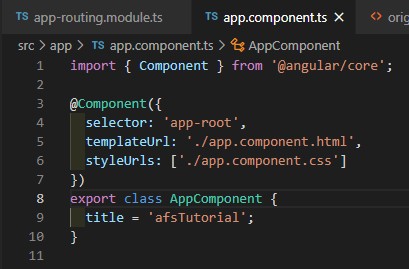
original-init-page.components.ts
Testing again
Pointing to:
http://localhost:4200/
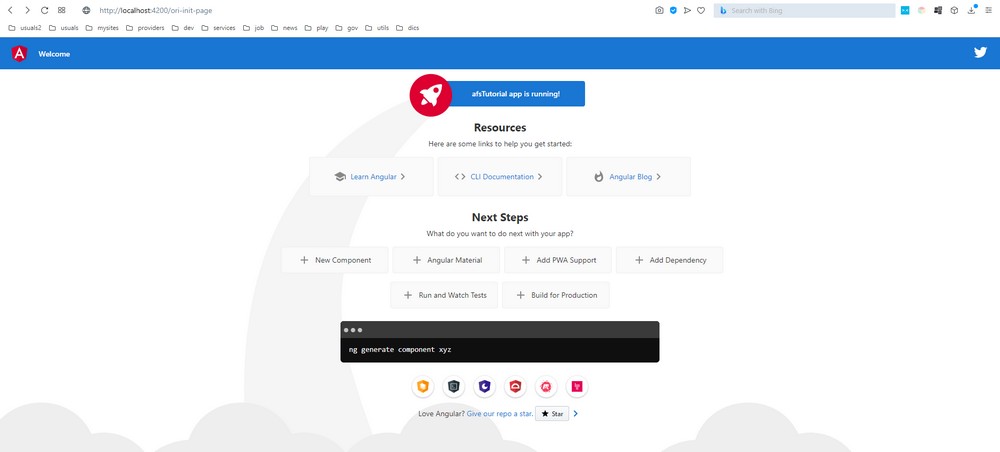
you shall get a blank page, without content, but pointing to:
http://localhost:4200/ori-init-page
it is returned the original page initial content.
NEXT
Angular From Scratch Tutorial – Index
Angular From Scratch Tutorial – Step 3: Binding
Brazilian system analyst graduated by UNESA (University Estácio de Sá – Rio de Janeiro). Geek by heart.