Revision 2022.
Table of Contents
TARGET
This tutorial is the 3rd step of the series and its code evolves from the 2nd step.
The target is to apply Object-Oriented and MVC architecture concepts.
The controller (the router) delivers to a business layer that accesses the persistence.
FAST START FOR THE IMPATIENT
– Help for linux (debian/ubuntu) install:
ultering_sequelize_tutorial_debian_install
After installing check the windows install below.
– Database user setup (just in the case):
postgres_user_setup
– Windows install:
1. Download source code from:
node_sequelize_ultering_ml40643_3rd_step
2. Use the same node_modules dir created from 1st step.
You may move it to save time and disk space.
Remember, node_modules must be under project’s root, in this case it is “node” dir.
If you don’t have it, you may create it from this sequence of commands:
npm install --save express express-generator
npm install - -save nodemon
npm install --save sequelize sequelize-cli
npm install --save pg pg-hstore
npm install --save sequelize sequelize-cli dotenv
npm install --save serve-favicon
npm audit fix --force
3. Go to app root dir and edit the config.json user config dir.
Switch the database configuration for your respective choice (dev/local, cloud, etc.).
4. Go to the app root dir and edit run.bat.
Set the APP_ENV envvar to match your choice.
rem SET APP_ENV=dev
SET APP_ENV=cloud
5. Run the app:
run.bat
6. Point to:
http://localhost:3000/
If you have gone through the 2nd step, users table will be available and populated:
http://localhost:3000/users
GENERAL NOTES
1. Although this tutorial uses PostgreSQL, it may be used any other database since the purpose of ORM is to provide a layer of abstraction for the database’s implementations. In this case, switch the configuration to match your choice, for instance, the “dialect” property value must be replaced by the new value from your choice.
2. IMPORTANT:
To protect clarity and keep the tutorial concise, the sequence and topics are provided in order to accomplish the main tutorial’s goal.
Of course, some details may cause some discomfort to the reader depending on his own knowledge and understanding.
3. The code available for download was implemented using Node.js v.16. Please, use the same version.
Why Using OO?
Although projects in JavaScript or C++ may be implemented without object-orientation, also making it possible to mix concepts, a better approach for the project’s clarity sake is to separate styles by layers accordingly to the contexts.
Within this thought, a project structure may use MVC model making room for another design pattern using a specific additional layer without interfering with each other.
This tutorial uses the OO (Object-Oriented) approach because it is one of the best choices to implement a project that may grow but is not the unique one.
OO helps to handle cohesion and avoid repeating code everywhere, keeping just one place to make maintenance easier.
The project’s structure gets a very concise approach making much recommended for team working.
OO is also extremely handful to treat domain relations, offering straight mapping for the growing complexity of a project.
The cost of using OO is very low, providing powerful flexibility.
Remembering that JavaScript OO syntax is so straight, it is easy to use.
REFACTORING THE PERSISTENCE
Using the code from the 2nd step, we will evolve to a better approach.
In the previous step, the PgSeqlDB class was useful just for the User table.
In a real project we have hundreds of tables.
That way, we need to split the common code to be shared with all tables from the specialized code for each one.
This complies with cohesion pattern.
Check cohesion/coupling Microsoft doc.
The immediate advantage is that you type less and maintenance becomes easier and faster.
Creating UserDB – User’s Specific Class
The central idea is to move the specific implementation created for User instance to its own file.
The common code to be used by all persistence’s classes remains in the PgSeqlDB class.
echo. > models\persistence\UserDB.js
/**
 * @File   : UserDB.js
 * @Author :  ()
 * @Link   :
 * @Date   : 17/06/2022 16:20:20
 */

const PgSeqlDB = require('./PgSeqlDB');
var Sequelize = require('sequelize');

/**
 * Database service using Sequelize and PostgreSQL for User table.
 *
 * @class UserDB
 */
class UserDB {

    dbconfig;
    createTable = false;
    populate = false;
    pgSeqlDB;
    userModel;
    sequelize;

    // pgSeqlDB.showConfig();

    constructor() {
        this.pgSeqlDB = new PgSeqlDB(this.createTable);
        this.dbconfig = this.pgSeqlDB.dbconfig;
        this.sequelize = this.pgSeqlDB.sequelize;
        this.defineUserModel();
        this.syncDb(this.createTable);
    }

    setCreateTable(createTable) {
        this.createTable = createTable;
    }

    setPopulate(populate) {
        this.populate = populate;
    }

    defineUserModel() {
        this.userModel = this.sequelize.define('User', {
            id: {
                type: Sequelize.INTEGER,
                allowNull: false,
                autoIncrement: true,
                primaryKey: true
            },
            username: Sequelize.STRING,
            password: Sequelize.STRING
        }, {
            tableName: 'user', // this will define the table's name
            //timestamps: false           // this will deactivate the timestamp columns
        });

    }

    /**
     * @param  {boolean} createTable if true, creates the tables.
     */
    syncDb(createTable) {
        this.sequelize.sync({
                force: createTable
            })
            .then(function (err) {
                //console.log('[INFO]: sequelize sync done');
            }, function (err) {
                console.log('An error occurred while creating the table:', err);
            });
    }


    insertUser(name, pass) {
        this.userModel.create({
            username: name,
            password: pass
        }).then(function (user) {
            console.log('[INFO]: ' + user.dataValues.username + ' persisted');
        });
    }

    populate() {
        this.insertUser("John Doe", "secret1");
        this.insertUser("Mary Doe", "secret2");
        this.insertUser("Jane Doe", "secret3");
    }

    showConfig() {
        console.log(this.dbconfig);
    }

    findById(id) {
        this.userModel.findByPk(id).then(function (user) {
            console.log('------------------------------------------');
            console.log('\n[INFO]: found: ' + user.id + ", " + user.username + '\n');
        });
    }

    findByName(name) {
        this.userModel.findAll({
            where: {
                username: name
            }
        }).then(function (data, err) {
            if (!data) {
                console.log('------------------------------------------');
                console.log('[FAIL]: user instance not found due to: ' + err);
                console.log('------------------------------------------');
            } else {
                console.log('------------------------------------------');
                //console.log(data);
                for (let u in data) {
                    console.log(data[u].dataValues);
                }
                console.log('------------------------------------------');
            }
        })
    }

    findAll(res) {
        this.userModel.findAll().then(function (data, err) {
            if (!data) {
                console.log('------------------------------------------');
                console.log('[FAIL]: user instance not found due to: ' + err);
                console.log('------------------------------------------');
            } else {
                let list = [];
                for (let u of data) {
                    list.push(u.dataValues);
                }
                return res.render('users', {
                    title: 'USERS',
                    users: list
                });

            }
        })
    }
    //
}

module.exports = UserDB;
DESIGN NOTE:
Observe this snippet:
…
See more at:
Composition over inheritance Wikipedia
Advice from the GoF: Favor Composition Over Inheritance
Refactoring the PgSeqlDB Class
The PgSeqlDB class will remain with the code that is shared among all other persistence classes.
Replace the previous code with this one:
var Dbconfig = require('../../config/config.json');
var Sequelize = require('sequelize');

/**
 * Database service using Sequelize and PostgreSQL.
 *
 * @class PgSeqlDB
 */
class PgSeqlDB {

    dbconfig;
    sequelize;

    static configuration() {
        // process.env.APP_ENV captures what was set in the run.bat in the line: SET APP_ENV=dev
        if (process.env.APP_ENV == 'dev') {
            console.log('[INFO]: database configuration set to development.')
            return Dbconfig.development;
        } else if (process.env.APP_ENV == 'prod') {
            console.log('[INFO]: database configuration set to production.');
            return Dbconfig.production;
        } else if (process.env.APP_ENV == 'cloud') {
            console.log('[INFO]: database configuration set to cloud.');
            return Dbconfig.cloud;
        } else if (process.env.APP_ENV == 'test') {
            console.log('[INFO]: database configuration set to test environment.')
            return Dbconfig.test;
        }
        console.log('[WARN]: database configuration not defined, assuming default (dev): ' + Dbconfig.development.database);
        return Dbconfig.development;
    }


    constructor() {
        this.dbconfig = PgSeqlDB.configuration();
        this.sequelize = this.connection(this.dbconfig);
    }


    connection(config) {
        let sequelize = new Sequelize({
            username: config.username,
            password: config.password,
            database: config.database,
            host: config.host,
            port: config.port,
            dialect: config.dialect
        });
        sequelize.authenticate(config).then(function () {
            console.log('[INFO]: database authenticated');
        }, function (err) {
            console.log('[EXCP]: database authentication failed due to: ' + err)
        });
        return sequelize;
    }


};


module.exports = PgSeqlDB;
module.exports = PgSeqlDB;
Testing the new design
Run the app (run.bat).
Point to:
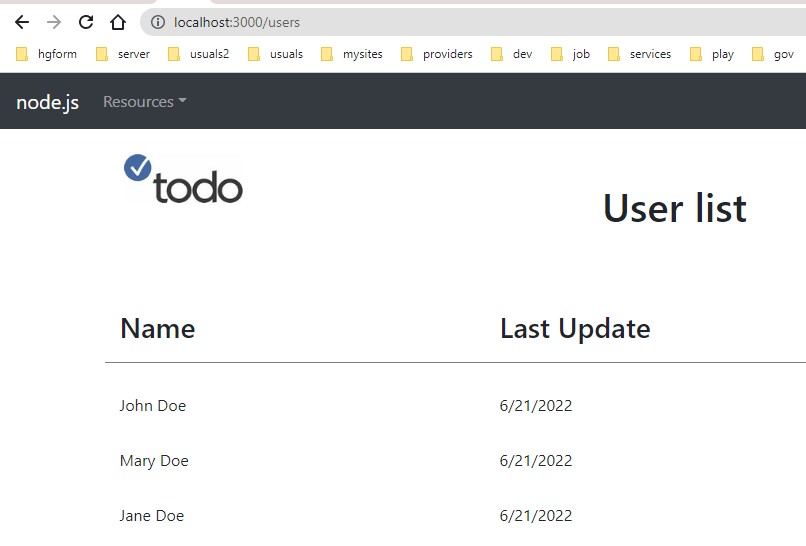
http://localhost:3000/users
The view shall render exactly in the same way.
ADDING THE BUSINESS LAYER
We’ve refactored the persistence layer.
Now, we need to refactor the router because it is accessing the persistence layer.
A good approach is to create a business layer that handles the use cases, abstracting the router from a concern that doesn’t belong to it.
In this case, the business layer reflects the needs of use cases and it is responsible to access the persistence layer.
In a simple project like this it would seem useless additional complexity but in a real project makes the difference.
Refactoring app.js
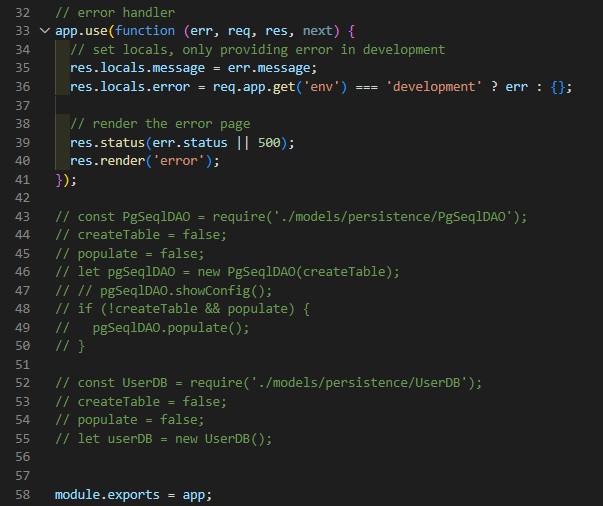
Comment the previous code.
The commented code is useful to help us understand the changes.
Creating the Business Layer
cd node
mkdir models\business
echo. > models\business\UserSvc.js
/**
 * @File   : userSvc.js
 * @Author :  ()
 * @Link   :
 * @Date   : 16/06/2022 22:27:12
 */

const UserDB = require('../persistence/UserDB');

class UserSvc {

    userDB;
    createTable = false;
    populate = false;

    constructor() {
        this.userDB = new UserDB();
    }

    setCreateTable(createTable) {
        this.createTable = createTable;
    }

    setPopulate(populate) {
        this.populate = populate;
    }

    async list(res) {
        return await this.userDB.findAll(res);
    }


    async findById(id) {
        return await this.userDB.findById(id);
    }

    async findByName(name) {
        return await this.userDB.findByName(name);
    }

    async findAll(res) {
        return this.userDB.findAll(res);
    }

}

module.exports = UserSvc;
Testing
Run the app (run.bat).
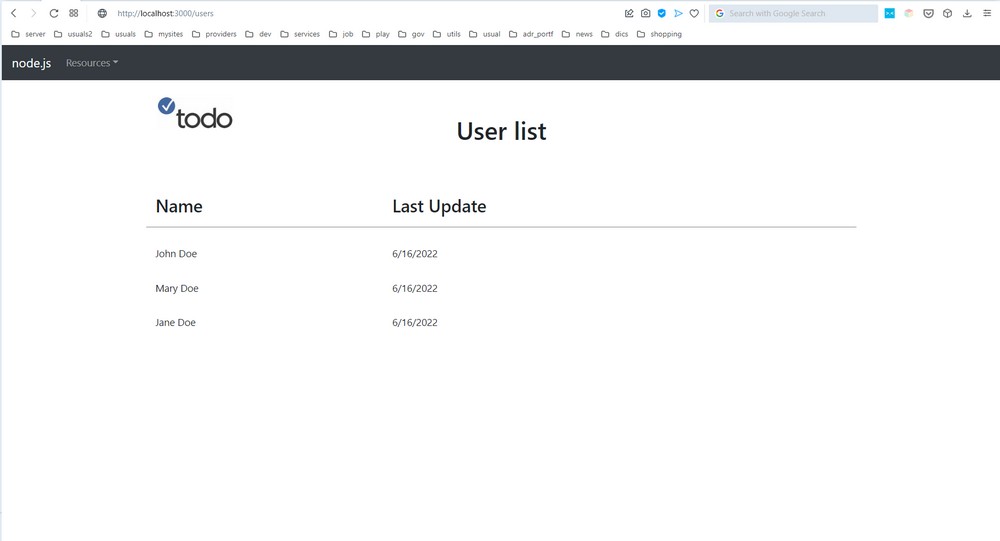
Point to:
http://localhost:3000/users
It is supposed to render as usual.
Conclusion
Now we have completed the most important concepts, implemented them and tested.
It is time to upgrade our skill applying them on a more complex use case that it will be seen on the next step.
SOURCE CODE
Source code to download on GitHub using Node.js v.16, node_sequelize_ultering_ml40643_3rd_step
INDEX:
NODE.JS: SEQUELIZE SERIES
Brazilian system analyst graduated by UNESA (University Estácio de Sá – Rio de Janeiro). Geek by heart.