Revision 2022
Table of Contents
TARGET
Post revised at 2022.
CREATING THE VIEW LAYER USING STUBS
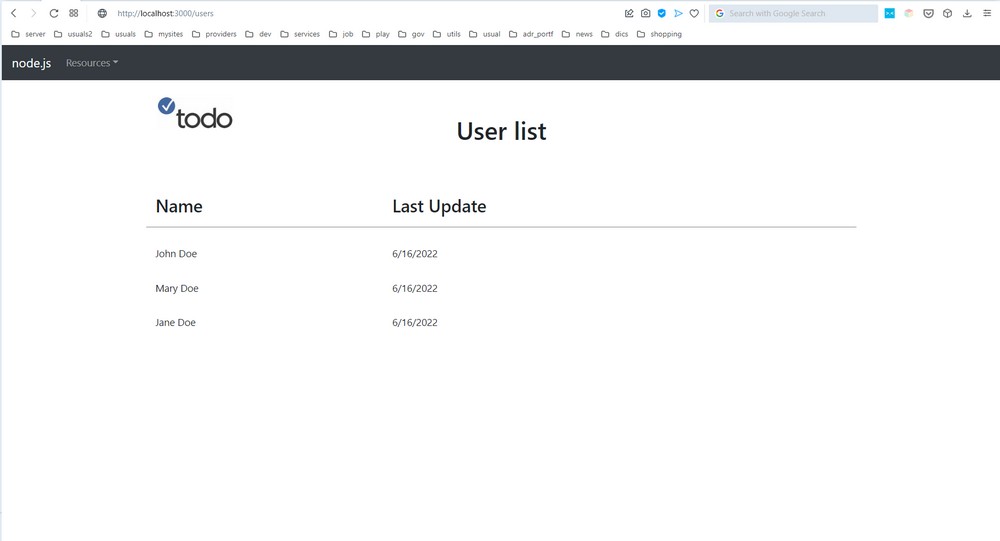
This step of the project will create a Todo list as shown in the picture above, using Bootstrap.
This project evolves from the 1st step.
Now, let’s follow to the 2nd step.
Projects need speed, so it goes faster using multiple development threads.
Suppose a small team (most cases in companies).
This team is split into front-end developers and back-end developers.
While the backend team is providing the persistence support, it may be offered a stub mocking the persistence to be used by the frontend team that simulates the database in order to show faster results to the stakeholders in order to obtain the approval confirmations at the very beginning of the project.
There are many ways of doing this.
One of the simplest is to create in-line code or hard-coded data.
A simple JavaScript array will do a good job, but when the complexity comes to a certain degree, such kind of approach doesn’t fit at all reverting as a disadvantage, remembering that users always ask for more and more. Gosh! Thank you! 🙂
In this example, applying the concept of a View Helper design pattern, we create an Object-Oriented stub instead of using a mock library to supply simulated dynamic changes in order that offers a more resourceful presentation.
Why not use a mock library?
Mocks use a different approach, separating status verification from behavior verification for Unit Test purposes.
In this example there is no need since we are just simulating the database with known data, intrinsically assumed as already validated.
Note:
A stub definition may have different concepts.
One under Unit Test context, the other outside it. Same as mocking.
Here, we are not testing the application, but just replacing a resource, simulating it — a mock, but not pertaining to the concept linked to Unit Test context.
More information here:
martinfowler.com/articles/mocksArentStubs.html
What is stub? – Definition from WhatIs.com
stackoverflow dicussion – many opinions
FAST START FOR THE IMPATIENT
– Help for linux (debian/ubuntu) install:
ultering_sequelize_tutorial_debian_install
After installing check the windows install below.
– Database user setup (just in the case):
postgres_user_setup
– Windows install:
1. Download source code from:
node_sequelize_ultering_ml40643_2nd_step
2. Use the same node_modules dir created from 1st step.
You may move it to save time and disk space.
If you don’t have it, you may create it following this sequence of commands:
npm install --save express express-generator
npm install - -save nodemon
npm install --save sequelize sequelize-cli
npm install --save pg pg-hstore
npm install --save sequelize sequelize-cli dotenv
npm install --save serve-favicon
npm audit fix --force
3. Go to app root dir and edit the config.json user config dir.
Switch the database configuration for your respective choice (dev/local, cloud, etc.).
4. Go to the app root dir and edit run.bat.
Set the APP_ENV envvar to match your choice.
rem SET APP_ENV=dev
SET APP_ENV=cloud
6. Edit app.js.
Check the following lines, that shall be set to false on the first run:
7. Run the app:
run.bat
8. Point to:
http://localhost:3000/users
9. Stop the app (Ctrl+C).
10. Switch:
createTable = false;
to
createTable = true;
Run the app again.
Check the database with a db client.
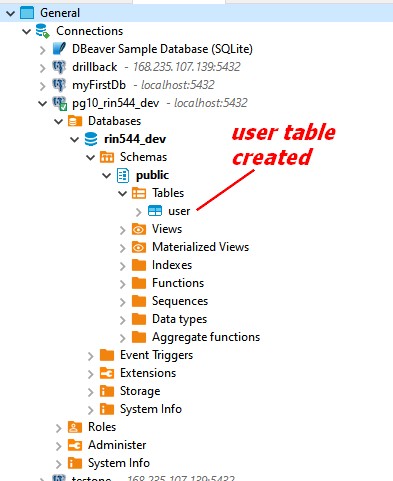
The user table was created.
10. Stop the app again.
IMPORTANT: don’t switch the booleans with the application running.
11. Switch to:
12. Stop the app.
13. Switch to:
populate = false
The tables was populated.
GENERAL NOTES
1. The source code doesn’t include the node_modules folder content.
Following the instructions, the node_modules content is automatically generated, but if desired it may be copied from the 1st step on GitHub under rin544b_1st_step folder.
2. The tutorial assumes Windows since it is the most used O.S. For Linux or Mac, you may just convert the system’s commands, but those pertaining to Node.js or npm commands are the same.
3. The $INSTALLDIR is the root dir where you’re supposed to place your project. For example, $INSTALLDIR=C:nodelab
4. The tutorial assumes that commands are issued on a prompt (console).
5. Although this tutorial uses PostgreSQL, it may be used any other database since the purpose of ORM is to provide a layer of abstraction for the database’s implementations. In this case, switch the configuration to match your choice, for instance, “dialect” property value must be replaced by the new value from your choice.
6. IMPORTANT:
To protect clarity and keep the tutorial concise, the sequence and topics are provided in order to accomplish the main tutorial’s goal.
Of course, some details may cause some discomfort to the reader depending on his own knowledge and understanding.
In such cases, we recommend that doubts may be solved comparing your code with the source code provided at the begin or at the end of this tutorial.
*********************************************************************************************
To start using this tutorial at its 2nd step, better if continuing from the first step:
Node.js v.16: GitHub , rin544b_1st_step
Source code after the tutorial is complete: download on GitHub , rin544c_2nd_step
*********************************************************************************************
REFACTORING THE CODE FROM 1ST STEP
Refactoring app.js file
Cut the code from:
var pg = require(‘pg’);
up to the end but keep the modules.export statement:
module.exports = app;
You may paste the code to a temporary file to help you understand what was done before and comparing it to the new code we are going to implement.
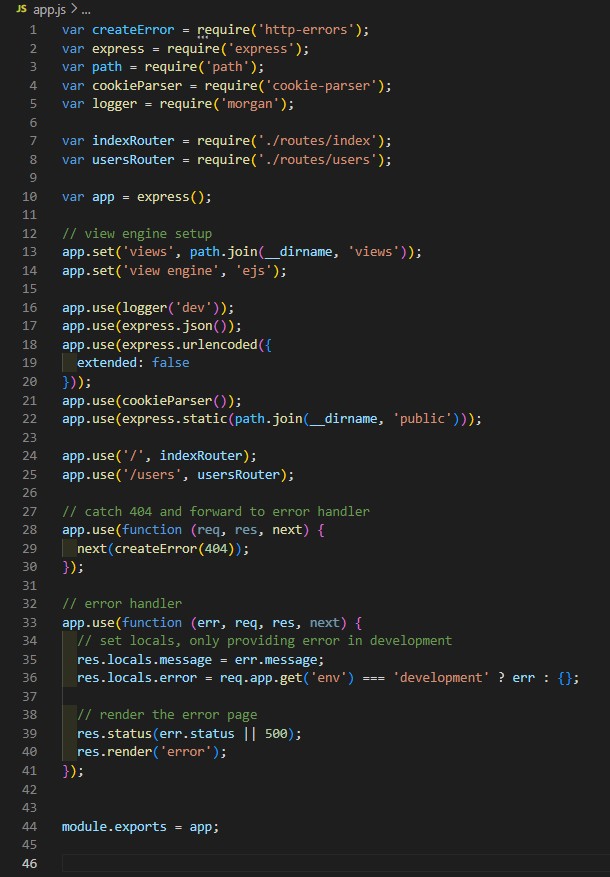
You shall have the app.js file like this:
Creating Routes
MVC projects have three layers: model, view, and control.
The model contains the business cases (from use cases) and the persistence model.
The view is responsible for rendering the content returned to the browser.
The control layer is responsible to handle the requisitions.
The app.js file in this project contains the code that handles our requisitions, so it plays the role of the front controller.
As the application grows, it is also necessary to split the code in order to keep it legible, maintainable.
The routes are specialized requisition handlers that enable us to divide the requisitions into groups turning the code easier to maintain the navigation.
Creating User’s Route
The “express” in the 1st step has already created part of the code for users.
You may find it in app.js file at:
app.use(‘/users’, usersRouter);
All we have to do is to complete the task providing a specific routing service for Users.
cd node
echo. > routes\users.js
Now edit “routes\users.js” and copy the content from “routes\index.js”, making small changes as shown below:
var express = require('express');
var router = express.Router();

router.get('/', function(req, res, next) {
  res.render('users', { title: 'USERS' });
});

module.exports = router;
If you have noticed, this code was copied from index.ejs and it was changed just this line:
res.render(‘users’, { title: ‘USERS’ });
Start simpler and evolve at each iteration.
NOTE: the idea of this tutorial is to evoke concepts, principles and patterns but there is no space here to go deeper.
Creating the User’s view
echo. > view\users.ejs
Edit view\users.ejs and add:
<!DOCTYPE html>
<html>
  <head>
    <title><%= title %></title>
    <link rel='stylesheet' href='/stylesheets/style.css' />
  </head>
  <body>
    <h1><%= title %></h1>
    <p>Welcome to <%= title %></p>
  </body>
</html>
Testing The User’s routing
Run the app:
run.bat
Point to:
http://localhost:3000/users
You shall get:
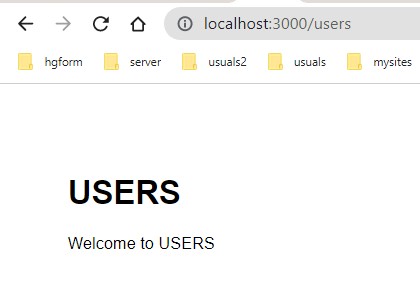
One more little step was accomplished.
Now, we are going to prepare the persistence layer and then we come back to the view to increment the view artifact.
REFACTORING THE PERSISTENCE
The 1st step used the app.js file to implement persistence for the sake of simplicity.
This was a didactic approach and shall not be used professionally.
A better way is to create specific files under their proper layers.
Why?
It is easier to maintain because if we put everything into just one file makes hard to maintain the code as it grows.
Even though we use many files, we must consider how to set them together using known patterns.
Code organization is vital for a well-designed app and shall consider separation of concerns.
In this tutorial, we apply small pieces of concepts of many patterns that lead a good app to a successful result.
Creating the Configuration Layer
The configuration layer may hold the app’s configurations.
In this tutorial, al least at this step, there will be just the database’s configuration.
cd node
mkdir config
echo. > config\config.json
Add the following code to the config.json file:
{
  "development": {
    "username": "postgres",
    "password": "postgres",
    "database": "rin544_dev",
    "host": "127.0.0.1",
    "dialect": "postgres",
	"port": "5432"
  },
  "db_dev_url": "postgres://postgres:postgres@localhost:5432/rin544_dev",
  "test": {
    "username": "postgres",
    "password": "postgres",
    "database": "rin544_test",
    "host": "127.0.0.1",
    "dialect": "postgres",
	"port": "5432"
  },
  "db_test_url": "postgres://postgres:postgres@localhost:5432/rin544_test",
  "production": {
    "username": "postgres",
    "password": "postgres",
    "database": "rin544",
    "host": "127.0.0.1",
    "dialect": "postgres",
	"port": "5432"
  },
  "db_prod_url": "postgres://postgres:postgres@localhost:5432/rin544",
  "cloud": {
    "username": "mutclyib",
    "password": "89RRrgOpCmuNkZxBMPxWC-5Koz2hvYCJ",
    "database": "mutclyib",
    "host": "tuffi.db.elephantsql.com",
    "dialect": "postgres",
	"port": "5432"
  },
  "db_cloud_url": "postgres://mutclyib:89RRrgOpCmuNkZxBMPxWC-5Koz2hvYCJ@tuffi.db.elephantsql.com:5432/mutclyib"
}
As you may notice, the configuration simultes a real case when we have different database configurations for dev, prod, etc.
Create the Persistence Layer
mkdir models\persistence
echo. > models\persistence\PgSeqlDB.js
This step rewrites the previous persistence implementation written in app.js to its own file.
You may choose to download this file: PgSeqlDB, or copy the code below:
var Dbconfig = require('../../config/config.json');
var Sequelize = require('sequelize');

/**
 * Database service using Sequelize and PostgreSQL.
 *
 * @class PgSeqlDB
 */
class PgSeqlDB {

    dbconfig;
    sequelize;
    createTables = false;
    userModel;

    configuration() {
        // process.env.APP_ENV captures what was set in the run.bat in the line: SET APP_ENV=dev
        if (process.env.APP_ENV == 'dev') {
            console.log('[INFO]: database configuration set to development.')
            return Dbconfig.development;
        } else if (process.env.APP_ENV == 'prod') {
            console.log('[INFO]: database configuration set to production.');
            return Dbconfig.production;
        } else if (process.env.APP_ENV == 'cloud') {
            console.log('[INFO]: database configuration set to cloud.');
            return Dbconfig.cloud;
        } else if (process.env.APP_ENV == 'test') {
            console.log('[INFO]: database configuration set to test environment.')
            return Dbconfig.test;
        }
        console.log('[WARN]: database configuration not defined, assuming default (dev): ' + Dbconfig.development.database);
        return Dbconfig.development;
    }


    constructor(createTables) {
        this.createTables = createTables;
        this.dbconfig = this.configuration();
        this.sequelize = this.connection();
        this.defineUserModel();
        this.syncDb(this.createTables);
    }

    defineUserModel() {
        this.userModel = this.sequelize.define('User', {
            id: {
                type: Sequelize.INTEGER,
                allowNull: false,
                autoIncrement: true,
                primaryKey: true
            },
            username: Sequelize.STRING,
            password: Sequelize.STRING
        }, {
            tableName: 'user', // this will define the table's name
            //timestamps: false           // this will deactivate the timestamp columns
        });

    }

    connection() {
        console.log('[INFO]: authenticating database: ' + this.dbconfig.database)
        let sequelize = new Sequelize({
            username: this.dbconfig.username,
            password: this.dbconfig.password,
            database: this.dbconfig.database,
            host: this.dbconfig.host,
            port: this.dbconfig.port,
            dialect: this.dbconfig.dialect
        });

        sequelize.authenticate().then(function () {
            console.log('[INFO]: database authenticated');
        }, function (err) {
            console.log('[EXCP]: database authentication failed due to: ' + err)
        });
        return sequelize;
    }

    /**
     * @param  {boolean} createTables if true, creates the tables.
     */
    syncDb(createTables) {
        this.sequelize.sync({
                force: createTables
            })
            .then(function (err) {
                //console.log('[INFO]: sequelize sync done');
            }, function (err) {
                console.log('An error occurred while creating the table:', err);
            });
    }


    insertUser(name, pass) {
        this.userModel.create({
            username: name,
            password: pass
        }).then(function (user) {
            console.log('[INFO]: ' + user.dataValues.username + ' persisted');
        });
    }

    populate() {
        this.insertUser("John Doe", "secret1");
        this.insertUser("Mary Doe", "secret2");
        this.insertUser("Jane Doe", "secret3");
    }

    showConfig() {
        console.log(this.dbconfig);
    }

    findById(id) {
        this.userModel.findByPk(id).then(function (user) {
            console.log('------------------------------------------');
            console.log('\n[INFO]: found: ' + user.id + ", " + user.username + '\n');
        });
    }

    findByName(name) {
        this.userModel.findAll({
            where: {
                username: name
            }
        }).then(function (data, err) {
            if (!data) {
                console.log('------------------------------------------');
                console.log('[FAIL]: user instance not found due to: ' + err);
                console.log('------------------------------------------');
            } else {
                console.log('------------------------------------------');
                //console.log(data);
                for (let u in data) {
                    console.log(data[u].dataValues);
                }
                console.log('------------------------------------------');
            }
        })
    }

    findAll(res) {
        this.userModel.findAll().then(function (data, err) {
            if (!data) {
                console.log('------------------------------------------');
                console.log('[FAIL]: user instance not found due to: ' + err);
                console.log('------------------------------------------');
            } else {
                let list = [];
                for (let u of data) {
                    list.push(u.dataValues);
                }
                return res.render('users', {
                    title: 'USERS',
                    users: list
                });

            }
        })
    }

};


module.exports = PgSeqlDB;
Register the PgSeqlDB in app.js
Append the following in the app.js file, always before the module.exports statement.
const PgSeqlDB = require('./models/persistence/PgSeqlDB');
createTable = true;
populate = false;
let pgSeqDB = new PgSeqlDB(createTable);
// pgSeqDB.showConfig();
if (!createTable && populate) {
  pgSeqDB.populate();
}
if(!createTable && !populate) {
  pgSeqDB.findById(1);
  pgSeqDB.findByName('John Doe');
  pgSeqDB.findAll();
}
You shall get the app.js like this:
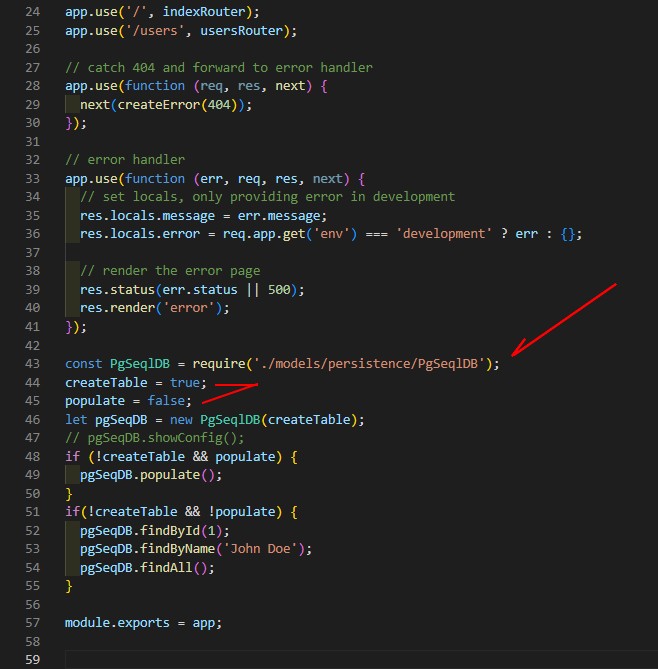
How does this code work?
It follows the same logic used in the 1st step except that you now have the code implemented in its own file.
Follow this procedure:
- Creating the tables.
Follow the picture:
createTable = true;
populate = false;
Run the application (run.bat).
Check the database (the user table is created without content).
The user table is created on the database:
.

. - Without the need to stop the app switch the flags as follow and save:
createTable = false;
populate = true;
The user table is populated.
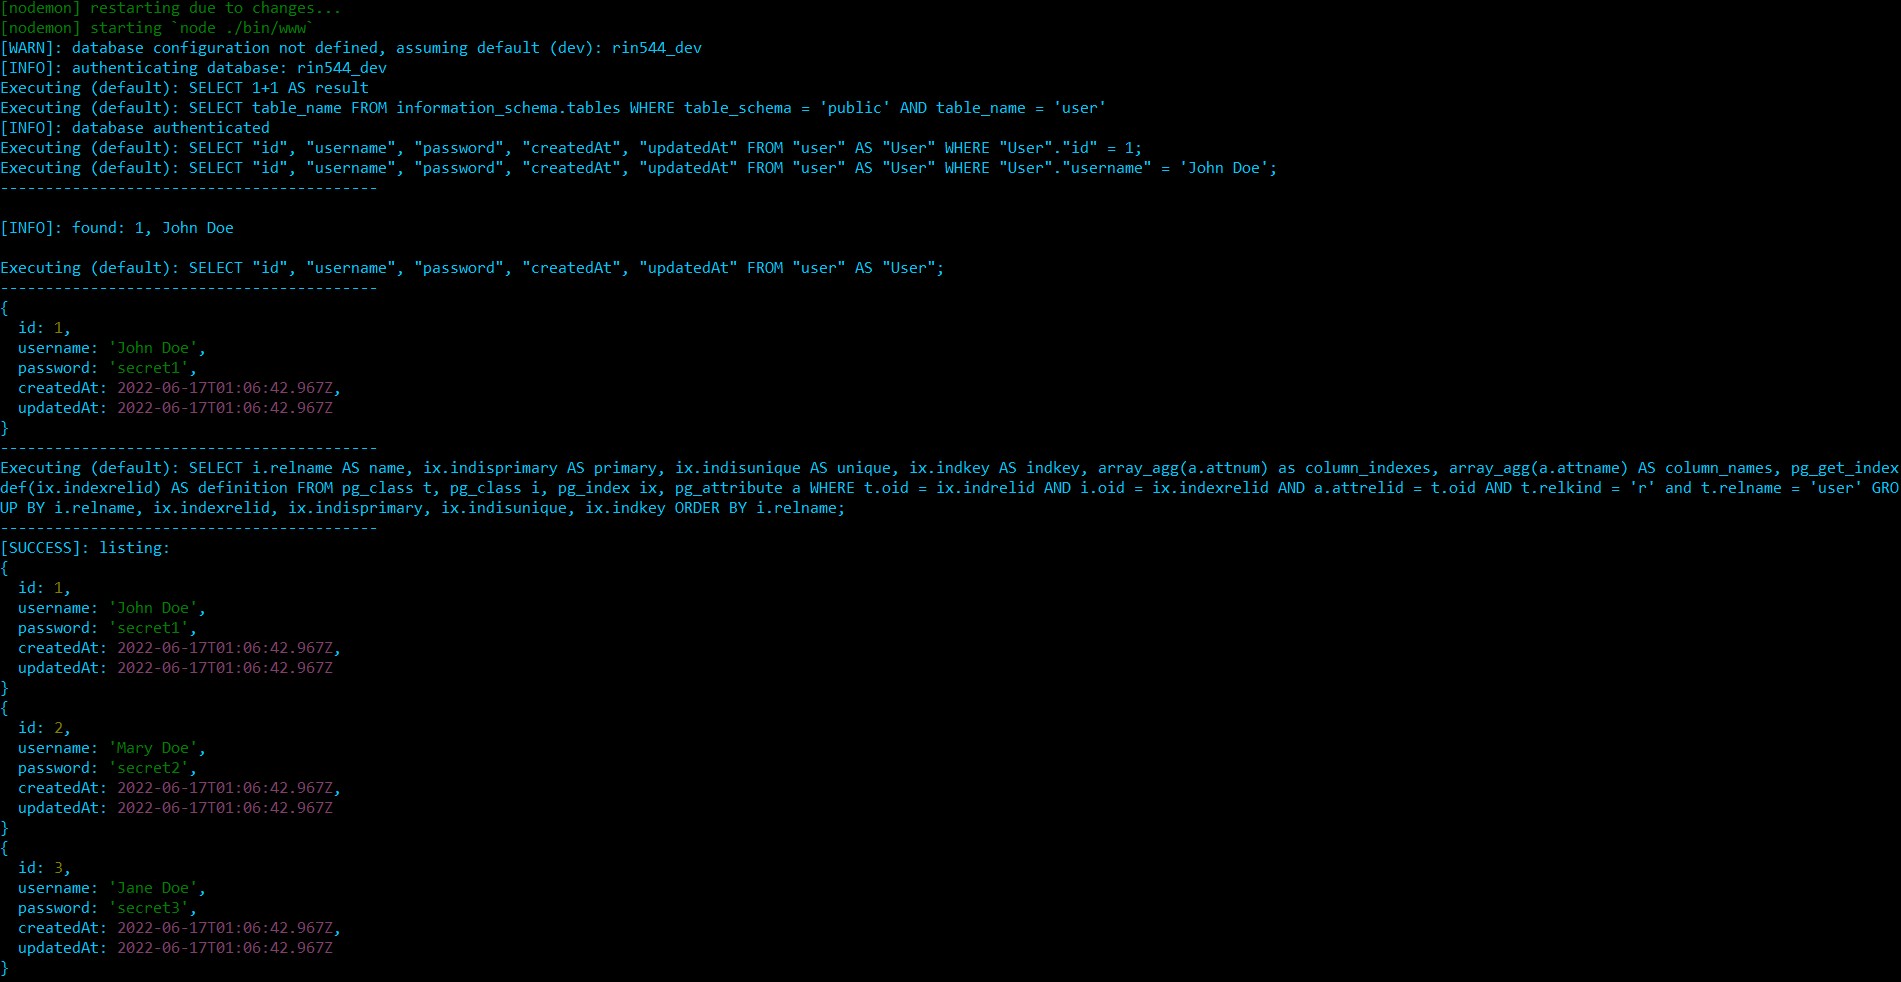
Go to the console and check the output .
Check the database and perform a select:
select * from public.user;
.

.
Also, go to the console and check the output .
. - Again, without the need to stop the app switch the flags as follow:
createTable = false;
populate = false;
The methods to find by id, by name and to list all instances are performed returning the result on the console just for testing purposes.
.

The new persistence layer was tested successfully.
This will be done later in the next steps using todo and todoItem use cases.
For now, the target is to understand the concepts and test the code we’ve implemented in this step.
REFACTORING: app.js and User Router
The block highlighted below in the app.js will be moved to the Router.
ATTENTION:
This is not the right way of doing things, and we are implementing that way, for now, to evolve later.
const PgSeqlDB = require('./models/persistence/PgSeqlDB');
createTable = false;
populate = false;
let pgSeqDB = new PgSeqlDB(createTable);
// pgSeqDB.showConfig();
if (!createTable && populate) {
  pgSeqDB.populate();
}
if(!createTable && !populate) {
  pgSeqDB.findById(1);
  pgSeqDB.findByName('John Doe');
  pgSeqDB.findAll();
}
Remove the highlighted block above from app.js.
Edit routes\user.js and replace the code with the following:
var express = require('express');
var router = express.Router();
const PgSeqlDB = require('../models/persistence/PgSeqlDB');


router.get('/', function(req, res, next) {
  //res.render('users', { title: 'Express' });
  pg = new PgSeqlDB(false,false);
  return pg.findAll(res);
});


module.exports = router;
You app.js shall be like this from the line where PgSeqlDB is declared up to the end.
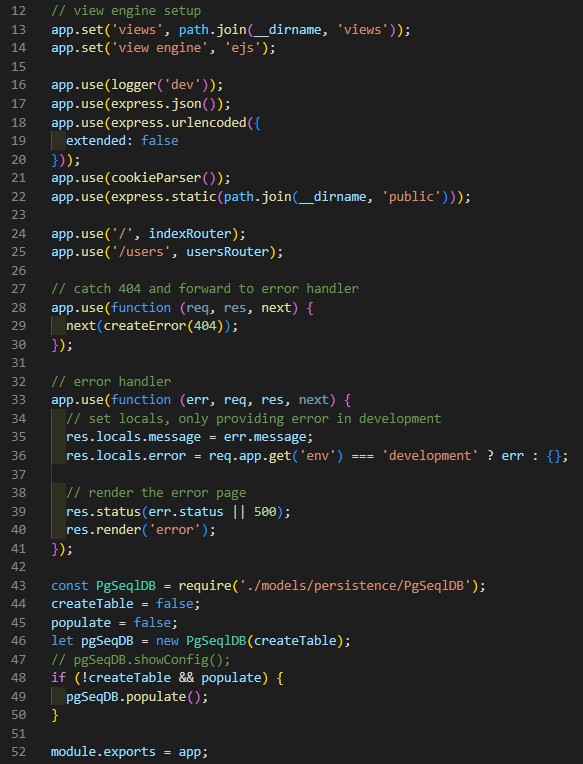
REFACTORING THE VIEW TO SHOW THE USER INSTANCES
Now it is time to refactor the view’s code to list the users using the persistence class created before.
Everything needed is ready to go.
Adding Bootstrap and the Static Files
Notice that the view uses Bootstrap and other references, so it is required to add the respective library.
CSS, images, Bootstrap and similars are stored under node\public folder.
Copy the content from the source code to your code — simplest way.
Refactoring the user.ejs View
Edit the users.ejs file and copy the following code:
users.ejs
<!DOCTYPE html>
<html lang="en">

<head>
	<meta charset="utf-8">
	<meta http-equiv="X-UA-Compatible" content="IE=edge">
	<meta name="viewport" content="width=device-width, initial-scale=1, shrink-to-fit=no">
	<meta name="description" content="">
	<meta name="author" content="">
	<title><%= title %></title>
	<!-- Bootstrap core CSS -->
	<link href="/stylesheets/pinegrow/bootstrap/css/bootstrap.css" rel="stylesheet">
	<!-- Custom styles for this template -->
	<link href="/stylesheets/pinegrow/starter-template.css" rel="stylesheet">
</head>

<body>
	<nav class="navbar navbar-expand-md navbar-dark bg-dark fixed-top">
		<a class="navbar-brand" href="#">node.js</a>
		<ul class="navbar-nav">
			<li class="nav-item dropdown">
				<a class="nav-link dropdown-toggle" href="#" id="navbarDropdownMenuLink22" data-toggle="dropdown"
					aria-haspopup="true" aria-expanded="false">Resources</a>
				<div class="dropdown-menu" aria-labelledby="navbarDropdownMenuLink22">
					<a class="dropdown-item" href="#">Action</a>
					<a class="dropdown-item" href="#">Another action</a>
					<a class="dropdown-item" href="#">Something else here</a>
				</div>
			</li>
		</ul>
	</nav>
	<div class="container">
		<div class="row">
			<div class="col-md-3">
				<img class="border border-0 border-light img-thumbnail w-50" src="../../images/todo_150.jpg" alt="">
			</div>
			<div class="align-middle col-md-6 mt-5 text-center">
				<h1 class="m-n3">User list</h1>
			</div>
			<div class="col-md-3"></div>
			<div class="col-md-3"></div>
			<div class="col-md-3"></div>
		</div>
		<div class="starter-template"></div>
		<div>
			<div class="row" style="margin-bottom: 30px; padding-bottom: 10px; border-bottom: 1px solid gray;">
				<div class="col-md-4">
					<h3>Name</h3>
				</div>
				<div class="col-md-8">
					<h3>Last Update</h3>
				</div>
			</div>
		</div>

		<% users.forEach(user => { %>
			<div>
					<div class="row" style="margin-top: 15px;">
							<div class="col-md-4">
									<p><%= user.username %></p>
							</div>
							<div class="col-md-4">
									<p><%= user.updatedAt.toLocaleDateString("en-US") %></p>
							</div>
					</div>
			</div>
	<% }) %>

	</div>
	<!-- /.container -->
	<!-- Bootstrap core JavaScript
    ================================================== -->
	<!-- Placed at the end of the document so the pages load faster -->
	<script src="/stylesheets/pinegrow/assets/js/jquery.min.js"></script>
	<script src="/stylesheets/pinegrow/assets/js/popper.js"></script>
	<script src="/stylesheets/pinegrow/bootstrap/js/bootstrap.min.js"></script>
</body>

</html>
REFACTORING THE PERSISTENCE LAYER ONCE MORE
var Dbconfig = require('../../config/config.json');
var Sequelize = require('sequelize');

/**
 * Database service using Sequelize and PostgreSQL.
 *
 * @class PgSeqlDB
 */
class PgSeqlDB {

    dbconfig;
    sequelize;
    createTables = false;
    userModel;

    configuration() {
        // process.env.APP_ENV captures what was set in the run.bat in the line: SET APP_ENV=dev
        if (process.env.APP_ENV == 'dev') {
            console.log('[INFO]: database configuration set to development.')
            return Dbconfig.development;
        } else if (process.env.APP_ENV == 'prod') {
            console.log('[INFO]: database configuration set to production.');
            return Dbconfig.production;
        } else if (process.env.APP_ENV == 'cloud') {
            console.log('[INFO]: database configuration set to cloud.');
            return Dbconfig.cloud;
        } else if (process.env.APP_ENV == 'test') {
            console.log('[INFO]: database configuration set to test environment.')
            return Dbconfig.test;
        } else {
            console.log('[WARN]: database configuration not defined, assuming default (dev): ' + Dbconfig.development.database);
            return Dbconfig.development;
        }
    }


    constructor(createTables) {
        this.createTables = createTables;
        this.dbconfig = this.configuration();
        this.sequelize = this.connection();
        this.defineUserModel();
        this.syncDb(this.createTables);
    }

    defineUserModel() {
        this.userModel = this.sequelize.define('User', {
            id: {
                type: Sequelize.INTEGER,
                allowNull: false,
                autoIncrement: true,
                primaryKey: true
            },
            username: Sequelize.STRING,
            password: Sequelize.STRING
        }, {
            tableName: 'user', // this will define the table's name
            //timestamps: false           // this will deactivate the timestamp columns
        });

    }

    connection() {
        console.log('[INFO]: authenticating database: ' + this.dbconfig.database)
        let sequelize = new Sequelize(this.dbconfig.database, this.dbconfig.username, this.dbconfig.password, {
            dialect: this.dbconfig.dialect,
            port: this.dbconfig.port,
        });
        sequelize.authenticate(this.dbconfig).then(function () {
            console.log('[INFO]: database authenticated');
        }, function (err) {
            console.log('[EXCP]: database authentication failed due to: ' + err)
        });
        return sequelize;
    }

    /**
     * @param  {boolean} createTables if true, creates the tables.
     */
    syncDb(createTables) {
        this.sequelize.sync({
                force: createTables
            })
            .then(function (err) {
                //console.log('[INFO]: sequelize sync done');
            }, function (err) {
                console.log('An error occurred while creating the table:', err);
            });
    }


    insertUser(name, pass) {
        this.userModel.create({
            username: name,
            password: pass
        }).then(function (user) {
            console.log('[INFO]: ' + user.dataValues.username + ' persisted');
        });
    }

    populate() {
        this.insertUser("John Doe", "secret1");
        this.insertUser("Mary Doe", "secret2");
        this.insertUser("Jane Doe", "secret3");
    }

    showConfig() {
        console.log(this.dbconfig);
    }

    findById(id) {
        this.userModel.findByPk(id).then(function (user) {
            console.log('------------------------------------------');
            console.log('\n[INFO]: found: ' + user.id + ", " + user.username + '\n');
        });
    }

    findByName(name) {
        this.userModel.findAll({
            where: {
                username: name
            }
        }).then(function (data, err) {
            if (!data) {
                console.log('------------------------------------------');
                console.log('[FAIL]: user instance not found due to: ' + err);
                console.log('------------------------------------------');
            } else {
                console.log('------------------------------------------');
                //console.log(data);
                for (let u in data) {
                    console.log(data[u].dataValues);
                }
                console.log('------------------------------------------');
            }
        })
    }

    findAll(res) {
        this.userModel.findAll().then(function (data, err) {
            if (!data) {
                console.log('------------------------------------------');
                console.log('[FAIL]: user instance not found due to: ' + err);
                console.log('------------------------------------------');
            } else {
                let list = [];
                for (let u of data) {
                    list.push(u.dataValues);
                }
                return res.render('users', {
                    title: 'USERS',
                    users: list
                });

            }
        })
    }

};


module.exports = PgSeqlDB;
Notice that the findAll method was refactored.
The console.log statement was replaced by the res.render block.
Go to the user.ejs file and look for users to understand how it works.
    findAll(res) {
        this.userModel.findAll().then(function (data, err) {
            if (!data) {
                console.log('------------------------------------------');
                console.log('[FAIL]: user instance not found due to: ' + err);
                console.log('------------------------------------------');
            } else {
                let list = [];
                for (let u of data) {
                    list.push(u.dataValues);
                }
                return res.render('users', {
                    title: 'USERS',
                    users: list
                });

            }
        })
    }
Testing the User List
Start the app (run.bat).
On the browser, point to:
http://localhost:3000/users
You get this:

The 3rd step will evolve the applied concepts refactoring the code to implement Todo/TodoItem use case.
SOURCE CODE
Source code to download using Node.js v.16: GitHub, node_sequelize_ultering_ml40643_2nd_step
INDEX:
NODE.JS: SEQUELIZE SERIES
Brazilian system analyst graduated by UNESA (University Estácio de Sá – Rio de Janeiro). Geek by heart.
