HOWTO
HOWTO
Contents
#SEARCHING
#TRACKING YOUR POSTS
There are 2 kinds of control on this platform:
– Internal
– External
#INTERNAL CONTROL
It is used for purpuses administration.
It enables to list by author, date, etc.
Go to menu, posts.

#EXTERNAL CONTROL BY SEARCH
The external control targets to restore information via token filtering using a “Search” box.
This is a powerful resource because enables to customize your information organization on your own criteria, grouping, classifying, warning, etc.
#STANDARDIZED TITLES
The posts’ titles on the platform shall follow a convention.
Syntax
CONTEXT: title
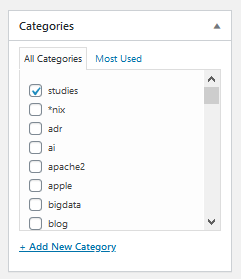
The context shall belong to one Category.
The category must be defined when the post is created (MANDATORY) otherwise, the post remains “Uncategorized” that must be avoided.
Example:
Node.js: How to Create A Simple Site
#STATEMENTS
A statement is a string following a convention inserted into the post during its edition as a placeholder or a token for searching purposes.
A placeholder is a mark to let you know that some action must be taken where the mark marks.
Example: TODO, FIXME, XXX
A placeholder may be one of your own (a customized placeholder).
Example: NOT TESTED
#CUSTOMIZED STATEMENTS
A customized statement comes from a convention defined by the post’s author.
The author must be coherent and concise when creating his convention otherwise the reader will not follow.
So a convention must be self-explanatory or at least to no provoke confusion.
#ANNOTATIONS
Annotations are better when following a very well know convention.
This platform adopts Java’s annotations, but the author may create its own taking care to be meaningful avoiding side effects like misunderstandings.
Example:
@Author: ultering.com@gmail.com
#GROUPING
Using statements and annotations you may group, classify and even supply status (warn, error, etc.) through your post collection.
When proceeding a search by an statement, the return will automatilly group all posts by the filter’s criterium.
#CATEGORIES
The category must be defined when the post is created (MANDATORY) otherwise, the post remains “Uncategorized” that must be avoided.
A category is a very abstract group, usually the parent of a domain of knowledge.
For example, Ubuntu is context and Linux is the category.
You may create category, but take care of the following detail:
Never ever create a category that should be a context.
A category misusage will lead you to be warned by the administrator to fix the error.

#TAGS
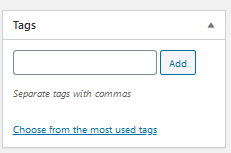
Tags are used by crawling machines, spiders, etc. created by the Internet’s search engines like Google, Bing, Yahoo, etc.
Tag is optional, but remember, it may help a your post to be found by a search engine.
Tags are only available for posts but not for pages.
#POSTS vs. PAGES DIFFERENCES
A page is used for administration purposes like this help.
An author uses posts.
#DRAFT
A post may is created as a draft and may be kept as a draft.
A draft is not available on the site and this status is useful while you are creating your post.
Whe the post is good to go, change its status to publish.
Check the “Publish” box on the right when editing a post.
#PRIVATE POSTS
A private post is just visible for its author.
You may use this feature to keep personal thing on the site.
At any time you may switch the status to public.
Check the “Publish” box on the right when editing a post.
#EDITING POSTS
Must know subjects.
It is not allowed other kind of subject that is not about IT (information technology).
If desired to create a page with personal information, it is necessary to create a private post, checking the following options at the post’s bottom:

– When editing a post, “Edit Next” is a straight shortcut to edit another post without returning for all posts page.

#SHORTCUTS
#HEADERS
To add a <h1> (header level 1) use Shift + Alt + 1.
If h2 use Shift + Alt + 2 and so on up to 6.
There are just 6 levels available.
If required more than this, it is recommended to review the post organization because more lower levels make it less readable.
Fewer levels are better.
#IMAGES
Point your cursor at the position you desire to insert a new image on the text, then drag and drop the image.
Use .jpg or .jpeg instead of .png.
.png images have greater sizes than .jpeq (.jpg) images.
Please, save space on server.
Please, make sure to offer a good name for the image to upload.
If necessary, add reverse date to make it unique.
Ex.: my_image_200328.
The good title enables easy search.
#VISUAL vs. TEXT MODE (HTML)
When editing a post or page you have two tabs on the right top to alternate between raw html and the WYSIWYG mode.
#CODE, SNIPPETS
Use code or snippets between <pre>CODE HERE</pre> htlm tags.
The platform will format the chunk between pre tags automatically on the view mode (not on the edition mode).
Example:
<pre>
CODE HERE
</pre>
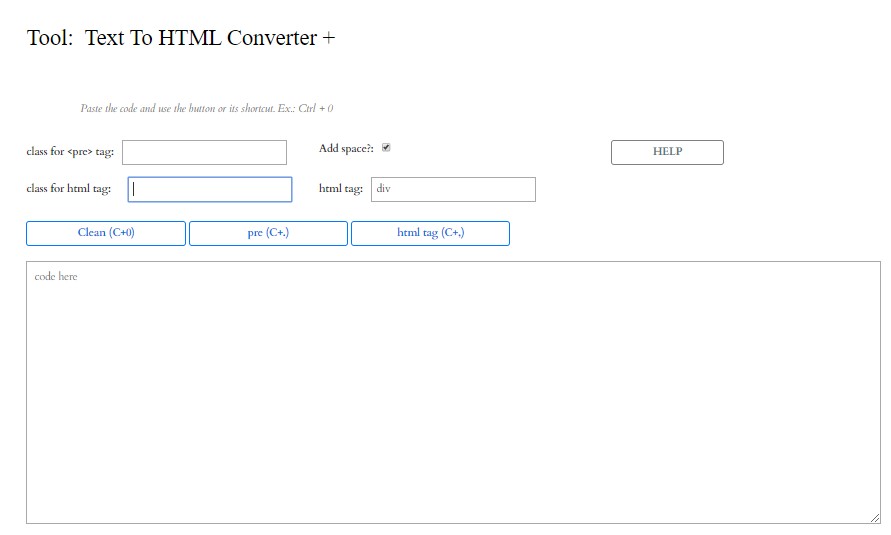
There is an internal tool that helps the author on this task Text To HTML Converter +
#IMAGES
The platform applies a default format to all images that may be not desired by the author, causing an exceedingly sized image.
This is simple to change. Go to the “Text mode” to edit straight HTML and remove the class=”…” attribute from the HTML <img> tag.
Example:
- BEFORE:
<img class="alignnone size-full wp-image-2286" src="https://ultering.com/it4us/wp-content/uploads/2020/03/wordpress_tags.png" alt="" width="231" height="153" />

- AFTER:
<img src="https://ultering.com/it4us/wp-content/uploads/2020/03/wordpress_tags.png" alt="" width="231" height="153" />
#CSS
The platform provides buit-in CSS tags for text style customization.
default
code here
.programlisting
used to wrap code
<pre class="programlisting"><!DOCTYPE html>
<html lang="en">
<head>
<meta charset="utf-8">
<meta http-equiv="X-UA-Compatible" content="IE=edge">
<meta name="description" content="">
<meta name="author" content="">
<title>New page</title>
<link href="css/style.css" rel="stylesheet">
</head>
<body style="display:grid;grid-template-columns:1fr 1fr;grid-template-rows:100px;"></body>
</html>
</pre>
Comes to:
<!DOCTYPE html>
<html lang="en">
    <head>
        <meta charset="utf-8">
        <meta http-equiv="X-UA-Compatible" content="IE=edge">
        <meta name="description" content="">
        <meta name="author" content="">
        <title>New page</title>
        <link href="css/style.css" rel="stylesheet">
    </head>
    <body style="display:grid;grid-template-columns:1fr 1fr;grid-template-rows:100px;"></body>
</html>
.programlisting2
used to wrap code
<pre class="programlisting2"><!DOCTYPE html>
<html lang="en">
<head>
<meta charset="utf-8">
<meta http-equiv="X-UA-Compatible" content="IE=edge">
<meta name="description" content="">
<meta name="author" content="">
<title>New page</title>
<link href="css/style.css" rel="stylesheet">
</head>
<body style="display:grid;grid-template-columns:1fr 1fr;grid-template-rows:100px;"></body>
</html>
</pre>
Comes to:
<!DOCTYPE html>
<html lang="en">
    <head>
        <meta charset="utf-8">
        <meta http-equiv="X-UA-Compatible" content="IE=edge">
        <meta name="description" content="">
        <meta name="author" content="">
        <title>New page</title>
        <link href="css/style.css" rel="stylesheet">
    </head>
    <body style="display:grid;grid-template-columns:1fr 1fr;grid-template-rows:100px;"></body>
</html>
.programlisting3
<div class="programlisting3">
Hello!
Using programlisting3
</div>
Comes to:
Hello!
Using programlisting3
.programboxing
alternative to wrap code inside programlisting.
<pre class="programboxing"><!DOCTYPE html>
<html lang="en">
<head>
<meta charset="utf-8">
<meta http-equiv="X-UA-Compatible" content="IE=edge">
<meta name="description" content="">
<meta name="author" content="">
<title>New page</title>
<link href="css/style.css" rel="stylesheet">
</head>
<body style="display:grid;grid-template-columns:1fr 1fr;grid-template-rows:100px;"></body>
</html>
</pre>
Comes to:
<!DOCTYPE html>
<html lang="en">
    <head>
        <meta charset="utf-8">
        <meta http-equiv="X-UA-Compatible" content="IE=edge">
        <meta name="description" content="">
        <meta name="author" content="">
        <title>New page</title>
        <link href="css/style.css" rel="stylesheet">
    </head>
    <body style="display:grid;grid-template-columns:1fr 1fr;grid-template-rows:100px;"></body>
</html>
.wrongprogramlisting
used to wrap wrong code or not useful
.output
Output:
<!DOCTYPE html>
<html lang="en">
    <head>
        <meta charset="utf-8">
        <meta http-equiv="X-UA-Compatible" content="IE=edge">
        <meta name="description" content="">
        <meta name="author" content="">
        <title>New page</title>
        <link href="css/style.css" rel="stylesheet">
    </head>
    <body style="display:grid;grid-template-columns:1fr 1fr;grid-template-rows:100px;"></body>
</html>
.outputlisting:
Used to wrap code from an external output (for instance from prompt, pgms, etc).
Output:
<!DOCTYPE html>
<html lang="en">
    <head>
        <meta charset="utf-8">
        <meta http-equiv="X-UA-Compatible" content="IE=edge">
        <meta name="description" content="">
        <meta name="author" content="">
        <title>New page</title>
        <link href="css/style.css" rel="stylesheet">
    </head>
    <body style="display:grid;grid-template-columns:1fr 1fr;grid-template-rows:100px;"></body>
</html>
#<div> , <span> , <code>
The same CSS classes used for <pre> tag may be used to another tag.
Using <div> or <span> scapes the default format that overwrites the classes.
.outputlisting2
That way, some CSS classes may not work well with when used with <pre> tag.
This is the case of .outputlisting2 class that shall be used with
Examples:
#Using <div> tag
outputlisting2 is not useful with <pre> tag
</div>
#Using <span> tag
<span class=’outputlisting2′>
outputlisting2 is not useful with <pre> tag
</span>
#Using <code> tag
<code class='outputlisting2'>

outputlisting2 is not useful with <pre> tag

</code>
There is an internal tool that helps the author on this task Text To HTML Converter +
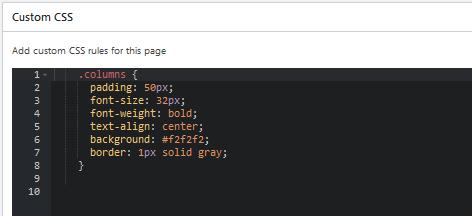
#CUSTOM CSS
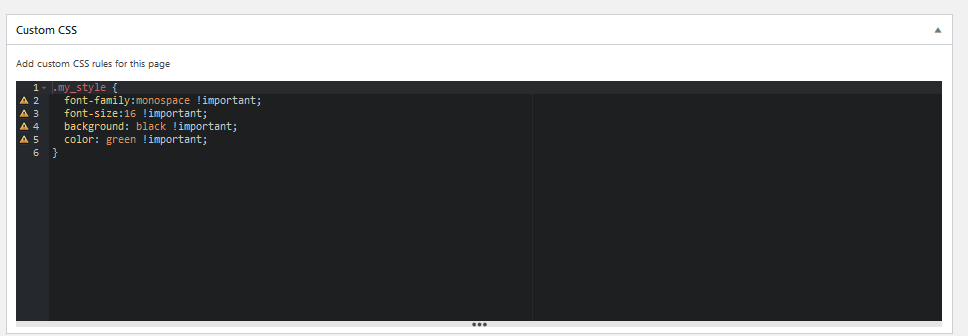
The author may create his own CSS classes.
Go to the “Custom CSS” box and set your CSS code in it.
Follow the example:
hello world!
</div>
<span class=”my_style”>
hello world!
</span>
#BOOTSTRAP
It is possible to work with bootstrap.
Example:
<div class="container">
    <div class="row">
        <div class="col-md-4">md4</div>
        <div class="col-md-4">md4</div>
        <div class="col-md-4">md4</div>
    </div>
        <div class="row">
        <div class="col-md-8">md8</div>
        <div class="col-md-2">md2</div>
        <div class="col-md-2">md2</div>
    </div>
</div>
Resultado

#TEMPLATES
There are some templates available to be used as models for page design using bootstrap, CSS.
Copy its code and paste to your page.
SEE Templates
#SHORTCODES
Shortcodes are a very powerful feature that enable to add a chunk of code using simple instruction.
Shortcodes are defined between square brackets.
Syntax:
#AVAILABLE SHORTCUTS
#SPACING – FORCING TOP MARGIN
NOTE: to use, remove the dots.
#[.sc name=”sep15″.]
Inserts a top margin of 15px.
#[.sc name=”sep30″.]
Inserts a top margin of 30px.
#[.sc name=”sep50″.]
Inserts a top margin of 50px.
#SECURITY
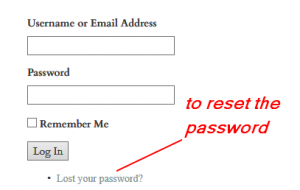
#RESET PASSWORD
There are two ways – internal and external access.
1. Go to the menu, profile.
or
2. Go to home page, login, “Lost your password?” link.
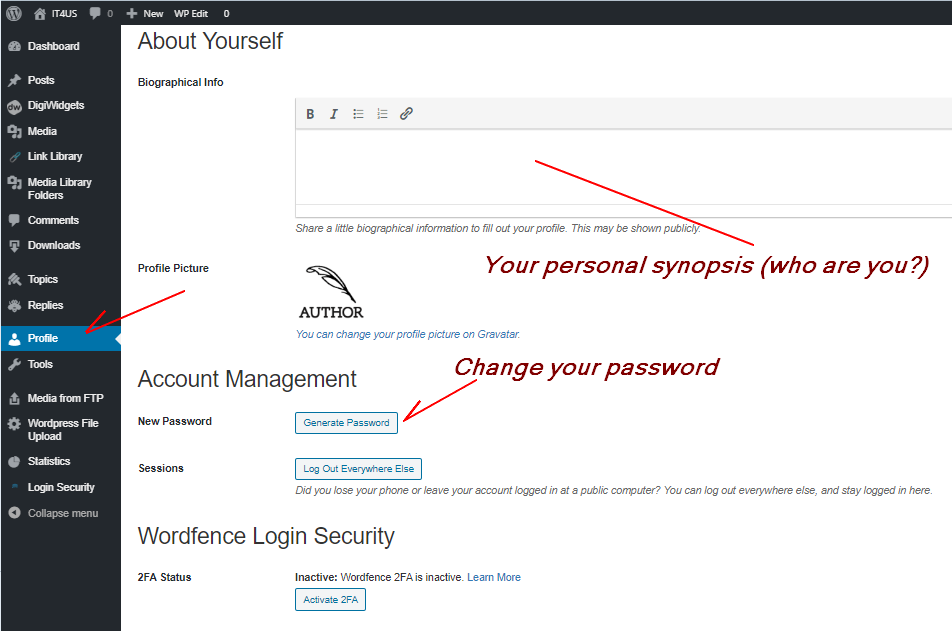
#PASSWORD / #PERSONAL INFORMATION
Go to the menu, profile.
F’ollow by the image below.
#TOOLS
Some small tools are available at TOOLS
#Text To HTML Converter +
@FROM: lab – draft project N. rin544d
#setup
Go to:
Menu, Shortcoder, text2htmlPlus, text2html.html
https://ultering.com/it4us/wp-admin/edit.php?post_type=shortcoder
Working straight on Shortcoder I got malfuncion, then work outside and just copy to Shortcoder taking care of including just script code plus html code between <body> without including the <body> tags itself.
@SEE: wordpress***maint:
https://ultering.com/itstuff/?p=17036
Backup:
M:\work\devcli_\javascript\conversions\text2html.html